Hey everyone. So I've seen a few posts lately asking for advice on makeup, hair, skincare, and etc, so I thought I'd do a post on what my routine looks like, what various products do, and tips and tricks I've learned throughout the years. A few of these tips are very cliche and common to those of you who have full routines, so I'm primarily writing this post for anyone who doesn't know how certain products work and are beginners at makeup/skincare stuff. Enough chit-chat, let's jump on in.
The basics of skincare
A beauty routine all begins with taking care of a very important organ; your skin. With all the thousands of products and Korean beauty routines you see nowadays, building a good skincare routine might seem a bit daunting, but it really isn't. You only need a few products to get started. The main steps will include: cleanse, tone, moisturize and exfoliate.
It's important to first determine your skin type. Typically, there is normal, oily, dry, and combo. Normal isn't dry nor oily, it's just smooth. Oily is exactly what it sounds like; your skin will have a noticeable shine, and feel greasy. A dry type usually includes having tight and flaky skin. And combo skin can be a mix of any of those. Such as my combo oily/dry; you'll have dry patches on your cheeks but an oily T-zone.

Now that skin types are covered, let's move onto cleaning your skin.
Cleansing:
This is probably the most important step. Many people over-cleanse their face; that squeaky clean feeling isn't a good thing! You've stripped your skin of all its essential oils.
That being said, in order for your skin to properly absorb the other products, it should be free of any makeup, oils, and grime that accumulate throughout the day. You want to make sure your cleanser is gentle, while still being effective, this is especially important if you wear a lot of makeup.
I like to use natural, virgin coconut oil as my first cleanser. It's also a good time to note that if you have oily skin, using natural oils on your face isn't necessarily going to increase oil production. I've noticed no increase, and if anything all it has done is make my skin feel nourished, unlike the harsher soaps I would use before. And if you have dry skin, coconut oil will be your best friend here.
Of course, coconut oil might not be for everyone, so if you have dry skin, I'd go for a creamy, non-foaming cleanser such as First Aid's Beauty Face Cleanser to both cleanse and hydrate. If you have oily skin, I'd go for a light foaming cleanser to remove excess natural oils.
Tip: Look for sample sized bottles of cleanser at the drugstore and buy a couple before committing to one and spending money on the full bottle.

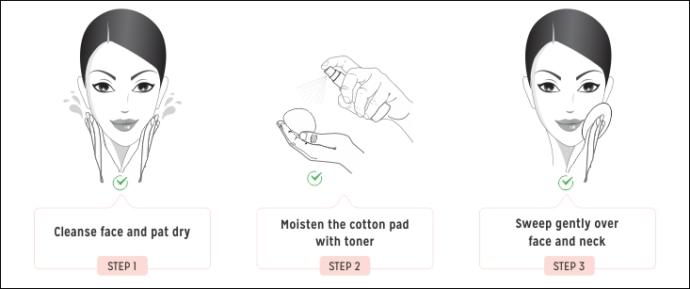
Toning:
Toning isn't always necessary, but it's helpful if you have oily skin, acne-prone skin, or you get blackheads and clogged pores often. Let's just note now that there are a lot of toners nowadays. They have various ingredients, some with beta and alpha hydroxy acids like salicylic and glycolic acid. These types of toners will further cleanse your skin after washing, and also balance your skin's pH. They also exfoliate your face at the same time.
The toner you need will depend on your skin type. There are various ones that hydrate, and others that calm sensitive skin, and some provide anti-aging properties, etc. I'd recommend avoiding any alcohol-based toners, as these are usually too dry no matter how oily your face is, at least in my experience.
I personally use a mix of the Proactive Revitalizing Toner, and rice water (If you haven't noticed yet, I strongly prefer natural products). The proactive helps my acne-prone forehead, whereas the rice water is good for the rest of my face which is relatively dry. If you're not familiar with rice water, here's the article that made me start using in case you're curious about using it yourself: https://www.onegoodthingbyjillee.com/the-beauty-benefits-of-rice-water/
Moisturizing:
This is probably my favorite step. As someone with combo dry/oily skin, it took me some time to find a moisturizer I was happy with. As like everything else, choosing one comes down to skin type. There are usually five types on the market. Cream, ointment, lotion, gel, or oil.
If you have oily skin: Oily skin can still become dry under the right conditions, so moisturizing is still a must. Some products can be too heavy for this skin type, and increase the greasy shine. I've found the Clinique Dramatically Different Gel, as well as coconut oil like we discussed previously, works relatively good on the oiler parts of my face. I know that Clinique is a bit pricey, so you could try out a drugstore light moisturizer first.
Dry skin: Sometimes slapping on globs of random lotions doesn't work. I've found it's best to use a product to lock in the moisture, as well as using a product that contains coconut oil or shea butter. If you're not a fan of greasy products, give the First Aid Beauty Ultra Repair Cream a try.
Normal skin: Find something that moderately moisturizes.
Moisturize before bed every night, and perhaps a light lotion in the morning too depending on your skin's needs.
Tip: Go for a hypoallergenic cleanser/toner/moisturizer if you have sensitive skin.
Yet another tip: Don't forget the eye cream; the skin around your eyes is very delicate and prone to wrinkles, invest in a decent eye cream to prevent that. I don't want to sound like an ad, but I use Belif Eye Bomb, and seriously, it's the bomb. But again, it's pricey (Mine's a sample size) so test a few drugstore ones out and see what works best if you'd rather.
Last tip: Don't forget to use lip balm.
Exfoliating:
Your skin sheds dead cells pretty often. It's good to remove that excess dead skin from your face to promote smoother, brighter skin. There are exfoliating products on the market that you can research into, such as chemical/fruit peels and skin brushes, but I prefer to make one out of natural ingredients, such as coconut oil, sugar, honey, and lemon juice. I find the coconut oil hydrates, while the lemon juice dries and creates a healthy balance. Lemon also brightens the skin. Honey is an anti-bacterial and I find it helps with blemish control. The sugar is what removes the dead skin cells.
The recipe I use, except I switched the olive oil out for coconut oil: https://beautybanter.com/diy-lemon-and-sugar-body-face-scrub
If that one doesn't work for you, don't fear. There are many more: https://www.stylecraze.com/articles/6-extremely-effective-homemade-scrubs-for-oily-skin/#gref
I exfoliate my face about once a week. You don't want to do it too often or you'll remove healthy skin cells as well and both dry out, and make your face's skin raw. To exfoliate, take a small amount of the product and a washcloth. Gently scrub your skin for about a minute or so and then wash it off with warm water. I'd recommend doing this step first, and then cleansing and toning afterward.
Tip: Don't forget to exfoliate your lips as well.

Bonus Face Mask section
Face masks are a lot of fun and can be great for your skin. I love ones that include aloe vera, honey, vitamin E, or avocado. They give my skin a nice boost in both hydration and glowy-ness when it's feeling kinda dull. Whether it's a peel off, wipe off, or sheet mask, I'd highly recommend giving them a try sometime.
Final tips:
1) Don't forget the sunscreen. Sun exposure causes wrinkles, so the sooner you protect your skin, the better.
2) Don't forget to moisturize your entire body to keep healthy skin.
3) Drink water. I know it's cliche, but it works.
4) Eat clean.
5) Do you have those red bumps on your upper arms and legs? It could be keratosis pilaris. You can't scrub them away. Find a glycolic acid lotion approved by your Dermatologist to make them disappear.
6) Don't smoke. It's bad for your health in general, including your skin.
Now that we've talked about skincare basics, we can move onto the fun part. Makeup.
The Basics of Makeup
If you know me (which, like, none of you do) you'll know that I love makeup. It's my hobby, stress reliever, and art form. I practically live for makeup (Joking of course... kinda) Now, there are dozens of ways to do your makeup, this is just how I learned to do it through trial and error, that being said, let's get right into it.
Tools:
You already have some great tools; your fingers. You can apply all sorts of makeup with your finger, but special tools come in handy for other products. Nice makeup brushes are a true investment. I used to buy 20 brushes for like, 10 dollars. They'd break within a few months. So invest your money in a quality, long-lasting brush. If you don't want to spend the money on an entire brush collection, which is very understandable, I'd get a powder brush, a beauty blender, a blush brush, and last but not least, an angled eyeliner brush. I use the last brush for eyeliner, concealer, highlight in the inner corner, etc, it's handy to have.
Tip: Q-tips, or cotton swabs, are an inexpensive but useful tool. Whether it's for fixing a small mistake or wiping away some eyeliner to make your wing sharper, they're helpful.

Primer/Foundation/Concealer
Primer is essentially what it sounds like. It primes the faces for other products to go over it smoothly. There are primers that decrease shine, redness, mattify, etc. So choose one depending on what you want out of it.
That all being said, not everybody needs a primer. If you have good skin and your makeup stays on all day, you could skip this step if you'd like. But for those with dry or oily skin who notice their foundation looks cakey or it disappears in a few hours, give the primer a try.
Apply about a quarter-sized droplet of primer to your face (You might need less, such as a penny-size, etc). Wait for it to dry, then move onto foundation.
Foundation is a pigmented formula used to even out your skin tone. Choosing a foundation isn't easy as there are hundreds out there. The main types are:
Liquid Foundation - This is a very common type. It's exactly what it sounds like, liquid formula. Though it can range in consistency from thick to thin. Choose the consistency depending on the coverage you want. Thin = Light coverage; Thick = Full coverage
Tinted Moisturizer - Again, it's exactly what it sounds like. It's a moisturizer that is pigmented to even out your skin tone while hydrating. You could use it as is, or over the moisturizer you already used.
Cream Foundation - Typically comes in a compact palette or a stick. It's creamy and holds no liquid qualities. It feels quite similar to stick concealers, actually.
Powder Foundation - It a pressed powder that provides coverage.
There are more kinds, but we're sticking to the basics here. So, how do you choose the right foundation? Well, the first tip is not to test the color on your hand or wrist, instead, swipe it on your jawline/lower cheek area. Foundations can change color as they try, so don't wipe it off immediately. Stroll around for a few minutes and check if the color either darkened or lightened as it dried.
You can apply foundation to your entire face either with a brush, sponge or dotting it on with your fingers and then blending with a foundation brush or beauty blender.
What's your undertone?
Skin tone can change depending on sun exposure. Your undertone, however, stays the same. It's a tone that can either be cool, warm, or neutral. Let's say you need an ivory foundation. If you're warm-toned, go for an ivory shade with a yellowish tone. If you're cool, go for an ivory shade that looks icier.

The type of foundation you'll need can change depending on the season. If it's hot and dry one day, then cold and wet the next, you might need a couple different foundations. If you're tan in summer but paler in winter you'll have to switch it up as well.
Tip: Don't forget to apply foundation down your neck too so it blends, and isn't a harsh cut-off line of flawless skin.
Concealer is a highly pigmented product used to conceal spots, redness, dark circles, etc. You can use it over foundation, or just bare skin. Concealer should typically be a shade or two lighter than your skin tone to conceal darker spots. That being said, don't go too light. You don't want to look like a reverse raccoon, or maybe you do. I won't judge.
If you have dark circles, find a high coverage product to cover them. I don't sleep and practically look like an actual raccoon, so I like the Tarte Shape Tape Concealer and Smashbox 24 hour Concealer. If it's too thin, it won't cover the area fully. You can use your fingers, a beauty blender, or concealer brush to apply this product anywhere you'd like to conceal.
Tip: Don't glob on concealer. Build it up in thin layers.
Set your entire face by using a face brush and setting powder, and let us move onto the next section.
Brows/Eyeliner/Eyeshadow
Brows frame the face. They're also sisters, not twins. Your eyebrows aren't symmetrical, one is usually higher, curvier, etc, and that's okay. As long as they're similar, you're good.
Be careful with the tweezers. You don't want to pluck your brows into little squiggly lines. But before you do any plucking, find a shape you like and make sure it'll work on your face and eye shape. Be precise, don't pull out clumps of hair, and take it slow.
Spoolies are amazing. Once you fill in your brows, use the spoolie to soften them up. Eyebrow products come in powders, pomades, gels, and pencils typically. As for shade, the rule I follow is if you have light hair, go 1-2 shades darker for brows, if you have dark hair, 1-2 shades lighter for brows. An angled eyeliner brush works well if it's a cream or powder. I like using a pomade and a pencil. The pencil to draw the shape I want, and then the pomade to fill in between the lines.

Eyeshadow is a great way to bring attention to your eyes. Whether you use neutral colors or bold colors, it'll make your eyes pop. Use an eyeshadow primer beforehand. And then slowly, build up the color instead of globbing it on again. Typically, you should apply the dark color in the crease, and a light shade in the inner corner of the eye. You can use your fingers, but I prefer a flat brush to pat on color, and then a fluffy blending one to blend it together. Using small circular or wind-wiper motions is a common way to blend out your shadow.
Eyeliner comes in many forms. I find a felt tip liquid eyeliner is best when you're learning how to apply it. But there are pencils, pots, powder, etc. Smudge it out, or keep it clean and classy. Adjust the line depending on your eye shape. Line the top of your lash-line, and then flick it out for a cat-eye look. You can use concealer on a small brush to make your wing sharper and fix any errors.

Don't forget the mascara. This can add so much drama and attention to your eyes. Curl your lashes, and then apply your favorite mascara, whether you want a volumizing or lengthening mascara, the choice is yours.
Tip: When applying mascara, if you 'push' your eyelashes towards your nose with the wand, it'll make them stand straight up and make your eyes look bigger.
Lips are one of my favorite parts of makeup. They're easy but can transform your look. I'd recommend always lining your lips to keep the lip product to stay on longer, it's essentially lip primer. Lip liner is also helpful if you have an uneven cupid's bow or just want to create a look that involves bigger lips.
Once you've lined your lips, apply your favorite lipstick/liquid lipstick/lip gloss over it. Liquid lipsticks typically last longer, so those are my personal favorite.
Blush/Contour/Highlight
Blush is fairly simple and should be applied to your cheekbones with a larger brush. Blush shouldn't stand out too much. I prefer natural colors that blend into the face, but by all means, play around with it and find what you like.
Contouring isn't fairly simple. There are some confusing parts, but basically, you apply darker shades to areas you want to recede, and highlight on areas you want to stand out. Whether you want to make your cheekbones more prominent, or your nose smaller, contouring can help you with that. However, not everybody looks good with contouring, especially if it isn't blended well. Which is another tip, blend everything out very well. Whether it's eyeshadow, foundation, or contour, blend until you can't blend anymore.
Tip: If you don't want to contour but still want some warmth or depth to your face, use a bronzer on the same areas you'd apply your contour.

Makeup is looked down upon a lot nowadays, which is kinda sad to me. I know some of you will ignore this, but you are beautiful with or without it. Makeup is both my empowerment, and my artistic outlet, and I hope some of you find joy in it too.
Last but not least, don't forget the setting spray to keep your makeup in place all day.
I was really hoping to include hair and nail care in this take as well, but I'm nearing the word-cap and I know I won't be able to fit everything in here. So this is where my post ends. If any of you like it and want one on nails, hair, and other beauty tips, let me know. These tips are what I use, and might not work for you, so find what's best for you and stick to it.
Thanks for reading my post. I hope you all enjoyed, and until next time, have a good day/evening everyone. <3
Most Helpful Opinions