 Girl's Behavior
  Guy's Behavior
  Flirting
  Dating
  Relationships
  Fashion & Beauty
  Health & Fitness
  Marriage & Weddings
  Shopping & Gifts
  Technology & Internet
  Break Up & Divorce
  Education & Career
  Entertainment & Arts
  Family & Friends
  Food & Beverage
  Hobbies & Leisure
  Other
Other  Religion & Spirituality
  Society & Politics
  Sports
  Travel
  Trending & News
 Hiya!
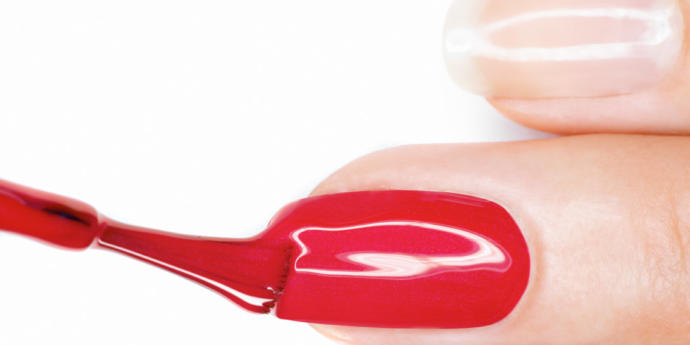
For a good portion of my life, I never bothered to paint my nails and would only do it sporadically. But in the past year or so, the act of painting my nails has really grown on me. I’ve always been pretty artistic, so the fact that I didn’t start to really enjoy it sooner is actually a bit weird. But there’s just something that’s relaxing about taking the time to sit down and paint my nails in pretty colors and designs. So here are some simple tips and tricks that I’ve learned along the way, that I hope will be beneficial for those who really want to become better at painting their nails!
1. Make sure that you have enough time
Honestly I cannot stress this enough. Nothing is more annoying than having to paint your nails in a rush and then instantly ruining them within seconds after finishing, because you didn’t have the time to wait for the polish to dry. So of course your experience with nail polish is going to be terrible if you try to rush it. To make it a relaxing and enjoyable experience, make sure that you’re not stressed out or you have somewhere to go in a few minutes. If you have a big event to go to, try to do your nails the night before to avoid any mishaps right before the event.
If I do a simple manicure with a base coat, a couple of layers of nail polish and a top coat, the whole ordeal will take about 20-30 minutes. Then I have to wait another 30 minutes to an hour before I can start to use my hands a bit more confidently. So at the very least you should have about an hour to spare, maybe 2 if you're a beginner and/or slow painter.
TIME-SAVING TIP 1: to save a little bit of time, use a quick dry top coat to speed up the process! My favorite quick dry top coat is from Essie. The top coat creates a protective and dry layer over the nail polish, so it’s less likely that you’ll get a mark or rip in the polish if you accidentally bump into something. You still have to be a little bit careful, it’s not 100% bulletproof as the nail polish is still drying underneath, but it does help speed up the process quite nicely.
TIME-SAVING TIP 2: try to paint on thin and even coats. Beginners often go a bit too heavy on the coats, so their nails end up getting covered in a gloopy mess that just never dries (I wish I could go back in time and tell 11-year old me to just chill out and not go crazy on the coats). Don't go too thin though, you should still cover your entire nail in polish and not leave any bare streaks. Take a five minute break in between the coats to let the nail polish dry a little bit before going in on your next coat. This way the whole thing dries a lot faster and you'll end up with a nice, even looking manicure.
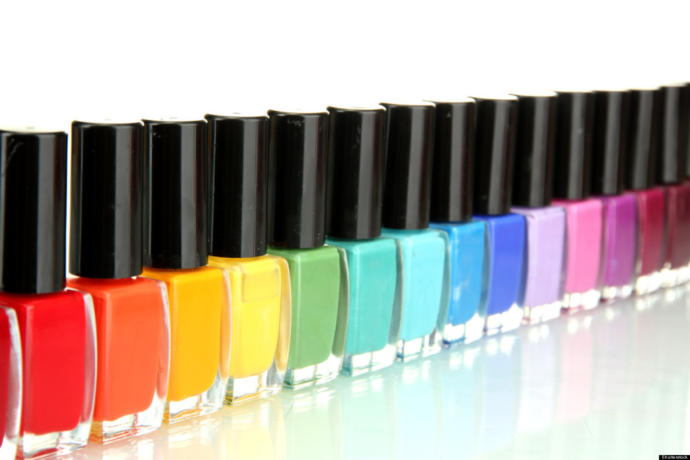
2. Invest in some high quality polishes
A nail polish is high quality if:
♡ It has a semi-thick and nice consistency, it shouldn’t be watery but neither should it be difficult to spread evenly over the nail.
♡ The polish itself is pretty opaque (i.e. not see-through) and should only need a couple of coats at most to cover the nail. Anything over 2 coats is stepping into garbage-territory, and you should only tolerate that sort of quality if you just really love the color/sparkle etc, or if you like the see-through look (for whatever reason).
♡ It doesn’t chip very easily and lasts on its own for at least 3 days.
♡ The brush of the nail polish doesn't leave visible streaks in the nail polish. It should look smooth and even, not striped or choppy.
♡ Remember that a high price doesn’t necessarily mean high quality. I’ve used some cheap polishes that completely blew my more expensive polishes out of the water.
3. Ways to make your manicure last longer
♡ Use a base coat and a top coat separately. Don’t buy that 2-in-1 BS, as base coats and top coats are supposed to do different things, and it’s just not possible for one product to perfectly do the jobs of both. It’s like buying a 2-in-1 shampoo and conditioner. Just no. The base coat almost acts like a glue and helps the polish stick to the nail (which is why some base coats feel a bit sticky to the touch even if it has dried) and the top coat is supposed to seal the nail polish in.
♡ Wrap the tips of your nails with the top coat to really keep the polish under wraps. Most people just do the top of the nail, but if you get the edge of your nail too, your manicure will last longer because it’ll be more difficult for the nail polish to start chipping off.
♡ Get some high quality nail polishes, the kinds I talked about in my previous point.
♡ If you use a nail polish with chunky pieces of glitter in it, don’t be afraid of putting on two coats of top coat to make the surface more smooth. It seals the glitters in nicely.

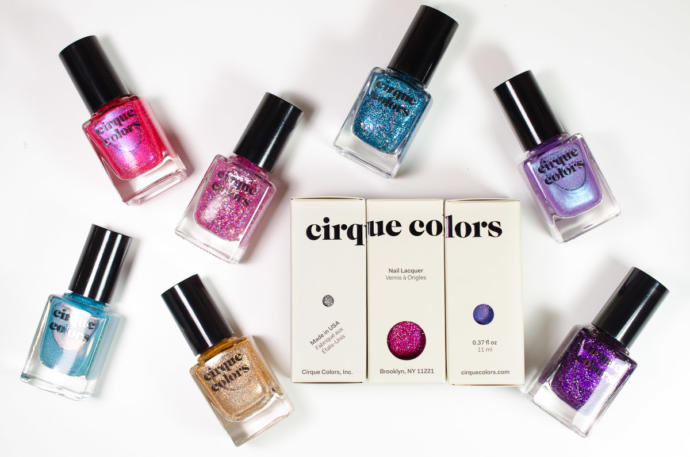
4. My favorite brands and polishes
My favorite nail polish brands consist mostly of indie brands, such as Cirque colors, F.U.N Lacquer and a-England. But I do have a few mainstream brands too, such as Essie and OPI. Essie and OPI seem to have some trouble with quality control though. Some of their polishes are great and only need like one coat (!!) while some of their other polishes are really runny and need many coats.
My favorite nail polish of all time is by Essie though, and it’s called Lady like. It’s a very flattering mauve color and it honestly needs just one coat to be fully opaque, two if you want the color to stand out just a little bit more. The best black nail polish I’ve ever owned is Memento mori by Cirque colors, it’s also opaque in one coat (which is extremely rare for black polishes) and has a really nice consistency. They also have a white polish called Carpe diem that’s really good, not quite as opaque as Memento mori but still very good since white polishes tend to look washed out and milky. My favorite glitter polishes are Halcyon, also by Cirque, and Royal Chapel (Holographic) by F.U.N Lacquer. Her rose adagio by a-England is also a pretty purple holographic nail polish.
5. Tools n’ stuff
If you want to put a little bit more effort into your manicures, here are some optional tools you can purchase to step up your polish game:
♡ A small, flat paintbrush to help remove any nail polish stains on your fingers. Most people would just use a q-tip dipped in nail polish remover, but because q-tips are rounded you don’t get a whole lot of control and you might mess up the sides of your nails. A flat brush dipped in some remover will really help you get under and around your nail, to get rid of any stains or leaking in your cuticles or on your skin.
♡ A square-shaped makeup sponge for gradients. All you need to do to get a nice gradient on your nail is to add some white polish as a base on your nail (it helps the colors become more vibrant), then add 2-3 colors onto the sponge and gently dab it onto the white base. It’s a quick way to make your nails a little bit flashier. You can buy some cheap makeup sponges on amazon, and all you need to do once you’ve used a sponge is to cut off the stained part until there’s no sponge left. A bag of 20 sponges might last you a lifetime if you don’t do gradients very often! Sponges also work great for applying nail polishes with chunky pieces of glitter in them. All you have to do is add a couple of layers of glitter polish on the sponge, and then evenly dab it on your nail. The glitters are more densely dispersed and some of the clear polish gets sucked into the sponge = more glitter payoff and less watery coats.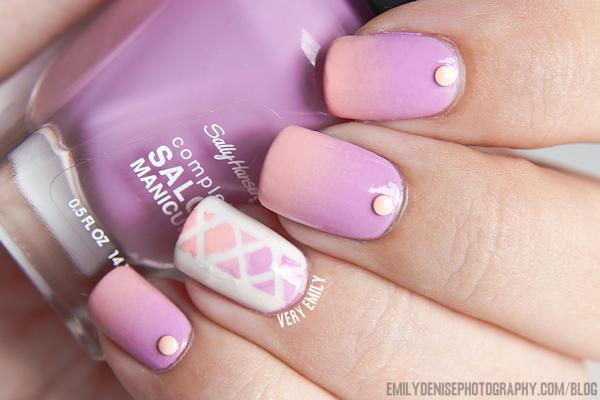
♡ Nail vinyls for simple designs. They're basically like stickers. Simply put on your nail polish as usual, let it dry, put a nail vinyl on, add another color on top of the vinyl and then quickly remove it. This is a quick and easy way to get a cool design on your nail, without having to be good at free-handing or spending hours on complicated original designs. I personally enjoy doing stripes or chevron patterns on my accent nail (middle or ring finger).

♡ A good nail oil or moisturizer. Removing nail polish always dries out your skin and the nail, which means that your nails are more likely to break and your skin/cuticles more likely to start flaking off. Always moisturize after removing any nail polish to make sure your hands stay fresh and healthy looking.
I buy most of my tools and extra nail decorations on amazon and ebay, they have some hella cheap prices and they’re surprisingly high quality too.
Aand that’s it! All you need really is some good polishes, time and patience. You’ll realize soon enough that the more you do your nails, the faster you’ll become and you’ll be less likely to mess up and get nail polish all over your fingers. I just love to sit down, have a cup of coffee, watch some Netflix and paint my nails after a long day. It’s really relaxing and therapeutic in a way. Thanks for reading!

What Girls & Guys Said
Opinion
0Opinion
Thank you for the tips. I'll try to get some of those off beat brands you mentioned. Every polish chips on my nails by day 2! Literally... And I always do the top coat with doing the ridges of my nails too... it's always such a bother. :/
Invest in a base coat too if you haven't already!
I have... to no avail...
I see simply nailogical~ <3 <3
Yes!! Learned a lot from her actually :D
Me too! My glitter nails look SO much better now!
Yes! Thank god for sponges and nail vinyls. I always thought you had to free-hand that shit
omg yes. Like I didn't even know how to do ombre nails before XD
Share the first opinion in your gender
and earn 1 more Xper point!