 Girl's Behavior
  Guy's Behavior
  Flirting
  Dating
  Relationships
 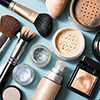 Fashion & Beauty
  Health & Fitness
  Marriage & Weddings
  Shopping & Gifts
  Technology & Internet
  Break Up & Divorce
  Education & Career
  Entertainment & Arts
  Family & Friends
 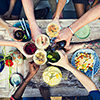 Food & Beverage
  Hobbies & Leisure
  Other
Other  Religion & Spirituality
  Society & Politics
  Sports
  Travel
  Trending & News
Food photography is a wonderful way you can help showcase and remember the many meals you prepare for yourself or others. A lot of at home chef's think they need to be professional photographers, have professional cameras, or get food stylists if they want their images to look like the ones in Food Magazines or in books, but the process can be fairly simple and cheap and still yield beautiful results. This will be your super basic, no frills or expensive photographic set-up/equipment approach to photographing your food that anyone can do.
1. What kind of camera do I need?
Contrary to popular belief, you don't need a big expensive DSLR to shoot. You can use any basic point and shoot or your camera phone, or that DSLR as long as YOU know how to use it. Getting a more expensive camera is not going to make you a better photographer if you don't know how to use it. It's just going to be a giant expensive paper weight. Focus more on understanding your own camera you have now, and learning how it works, what it can do for you, and knowing it's limitations, and then go from there.

2. What kind of supplies do I need? Aren't they expensive?
Don't let the image below scare you. You definitely don't need this much stuff. 10-15 items total can go a really long way, and most of that you will need is already lying about your house. At the most basic level, you'll need a camera, duh!, some sort of small table, sheer white curtain (or a photography scrim), and white/black foam or poster board. Invest in plain white and clear glass everything for your props. Why? Because you can find it almost anywhere at any price point. White/clear glass really allows most food to show well, you can use the stuff for actual eating and drinking, and you can use it multiple times. When I say all white or clear glass, I mean linens, plates, cups, saucers, etc.

From there, look around your house and find items that you can use to spice up your images...colorful pieces of fabric, paper, plates (make sure they are food safe if you intend to eat the food later), old pieces of wood, old rusty baking sheets, small baskets, parchment paper, paper bags, linens, marble, tile, brick, all manner of cutlery, you name it...just about anything can work as a background or a prop. PLEASE keep in mind, you are working in a very small space. You don't need a whole ton of stuff to fill that space. A plate, and a napkin and a simple background can make a stunning photo.

3. Where do I find these items?
Dollar Stores, Thrift Stores, Antique Stores, Garage Sales, World Market, Target, Ross, Marshalls, Walmart, Home Good Stores, Home Depot, your kitchen and linen closets, your mom's basement, etc. Literally everywhere.
4. How do I set it all up?

I cannot emphasize, how simple these things can be. In the image above, it's an open window, a cooling rack, parchment paper, white board, baking sheet, napkins, glasses, food. Here is a helpful video to show you how you can get a nice simple yet beautiful image with a simple set up.
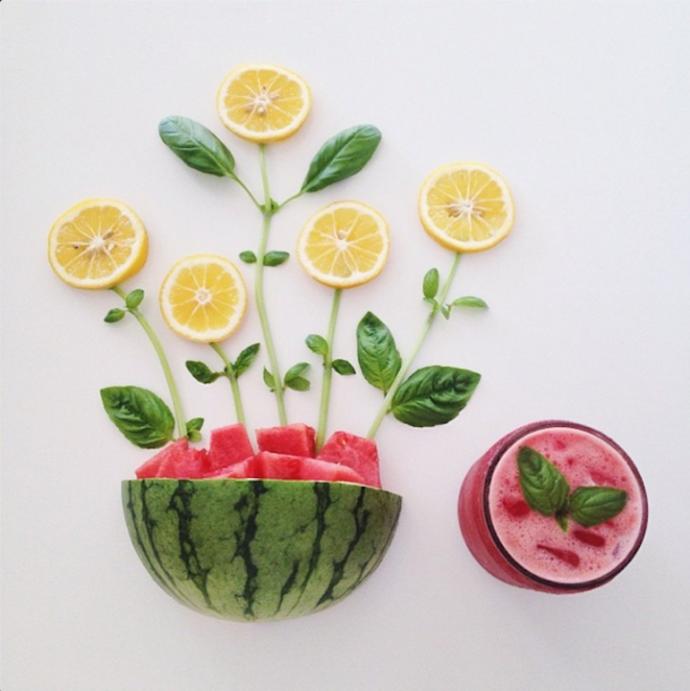
5. How do I arrange the food?
There are a couple of schools of thought and it will ultimately be up to you how you want to display your food, but typical setups are ones where you show the:
a) completed food products however a person would naturally eat them like on a plate or in a bowl or glass

b)components of the final food product with the food like a food progression

c) someone making/preparing/eating part or all of the food

d)food in motion being cooked, stirred, whipped, twirled, dripping, splashed, etc.

e)graphic or editorial style images of food
There are of course, other styles, and it will be up to you to both find them and use whatever style you personally like or mix it up.
6. But how do I keep my food looking good while I shoot?
A food stylist will literally spend a couple of hours with a chef individually handpicking each tomato, and curl of cheese that goes towards their photos because they are striving for a perfect product usually for advertisement purposes and money. They employ all manner of tricks, a lot of them rendering the food inedible, for the sake of the visual image. You, however, do not, and should not do that as an at home chef, because well, it's a waste of good food for one, and you don't need to do that just to get a great image.

Instead, plot ahead. If you have your window set up ready to go, think about what your final food product looks like. If you're baking a cherry pie, for example, you may want a darker background so the cherries pop out more, or you may want to incorporate a white napkin with red stripes to play on the red color. Lay these out and set up your backgrounds ahead of time whilst the food item is cooking or preferably before you even start cooking so you can keep an eye on your food. Practice shooting with a dummy item as a stand-in. See how the light looks against it, and where your best angles will be.

When the food is ready, MOVE QUICKLY especially if the items are hot and meant to be shown hot or especially if they are cold, because once they start melting, your shots may not look as good. Because you will have done the prop set up before hand, all you need in the shot is the food. Place it on your plate/surface, quickly work it a bit until it looks good to you, clean up any stray crumbs or sauce not meant to be seen, and then shoot hard and fast to get the food at it's freshest. Conversely if you are just starting out and that seems a bit too difficult, try first photographing a food item that can be set at room temp and not wilt, melt, congeal, or thaw on you.
Hope this gives you some helpful tips. As usual, practice makes perfect, and if it doesn't work out the first time, try and try again.

What Girls & Guys Said
Opinion
2Opinion
You are an editor of all trades. :) Another great MyTake. I saw below that this is a side business for you, do you focus on food you've prepared or do you take commissions?
This bit would be the hobby portion of mine. I don't do professional food photography but I do professional portrait and event work. I love to cook, and this was just a natural progression of my love of photography and my love of food. My dream, nearly realized, is to put together a family cookbook of our family recipes complete with pictures of course, for my family and friends.
You're really talented, I know you'll do it.
Thanks for the vote of confidence, and for all your wonderful comments on my posts. I really do appreciate hearing them.
I really don't see why anyone would do that. If I cook food, then to eat it. Not to make pictures of it.
Letting it get cold and shit is just a waste.
The type of Food Photography I do does not waste food. I or someone else eats everything I cook. The idea is that you have done the pre-set up so you shoot very quickly within minutes, and then you can eat whatever you make, or in the event in the first few minutes God forbid that piping hot bowl of spaghetti you juuuust brought off the stove turns into, what, a frozen block of ice, LOL, you return it to the stove or microwave and re-heat like you would even if you weren't doing food photography and your food got cold. Plus, you do know not all food that you make is hot, right?
Either way, you don't have to "get it." It just means food photography is not for you if you don't want it to be. Not a big deal. We all have our own set of passions, and if you don't like this one, find another one you do like.
Very interesting stuff. Good tips.
Is photography your hobby?
Both a hobby and my side business.
Business? Now I know how did you write a long take on photography very eloquently.